Requested Item vs Incident: Additional Comments
How do you define productivity? Part of productivity is time management—and a huge part of time management is having everything you need right in front of you. In the Service Operations Workspace, responding efficiently to a Requested Item (RITM) is essential, but unfortunately, the default interface doesn’t make it easy.
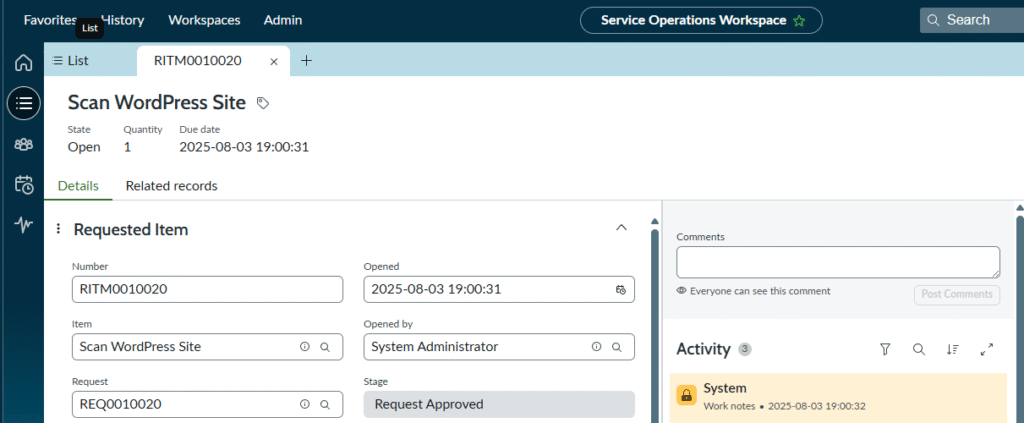
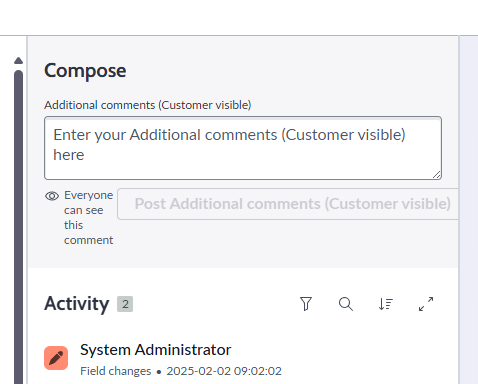
In a typical Requested Item, you only see Additional Comments on the right-hand panel of the Details tab. This may be fine for simple updates, but it falls short when agents need to add Work Notes or send emails directly from the workspace. That’s where the gap begins to impact productivity.
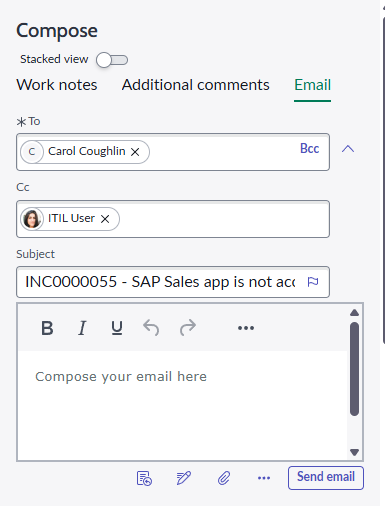
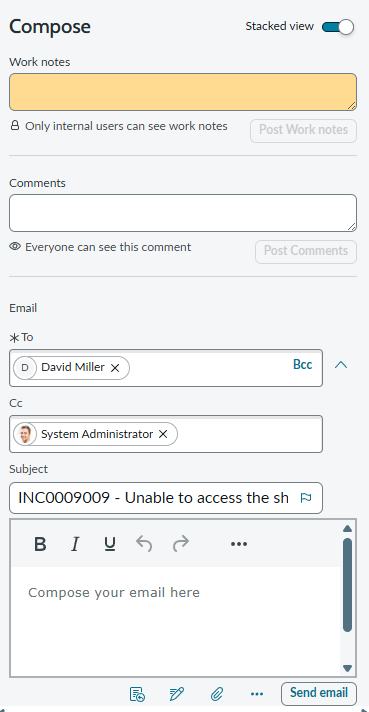
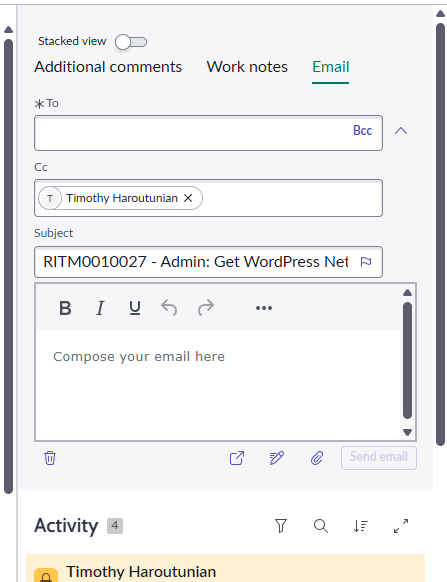
If you’ve worked with Incidents, you’ll know what’s missing. In an Incident record, you get access to both Work Notes and the Email Client. Better yet, you can switch between Stacked View or Combined View, depending on your preference. You don’t need to leave the page, open additional tabs, or hunt through related lists. All your communication options are right there—contextual, visible, and efficient.
Unfortunately, that same functionality doesn’t exist out-of-the-box (OOB) for Requested Items. You’re left with a bland view and fewer tools at your disposal, despite the fact that RITMs often involve just as much collaboration, coordination, and follow-up.
So how do we solve this? The answer is surprisingly simple—add the Email Client manually by updating the Dictionary attributes for the sc_req_item table. This enables the same Compose Email and Work Notes interface you’re used to in Incidents, right within the RITM record in Service Operations Workspace.
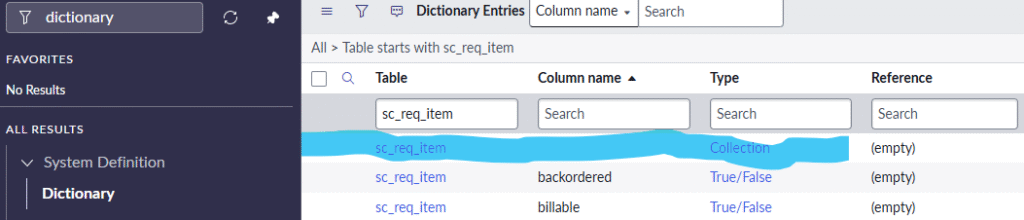
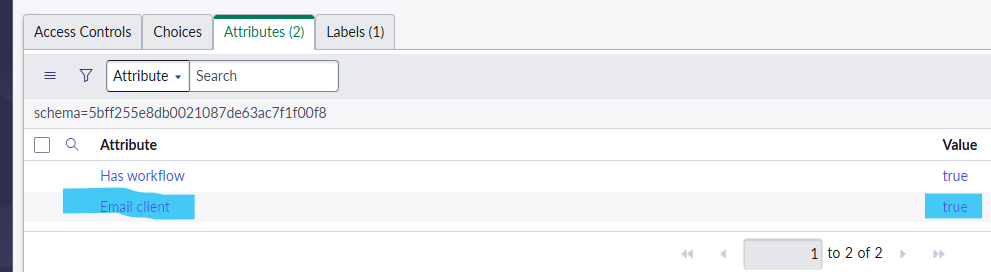
Open up the Dictionary Entry for the sc_req_item Collection record. Once in the Collection record, add in an Attribute for the Collection. Add the Attribute of Email Client (email_client = true) in the Attributes related list.
Here’s how to do it:
- Navigate to the Dictionary Entry for the sc_req_item Collection record.
- Once inside the record, go to the Attributes related list.
- Add a new attribute:
- Name:
email_client - Value:
true
- Name:
- Save the record.

That’s it. Once the change is made, reload any Requested Item within the Service Operations Workspace. You’ll now see the Email Client activated, along with the Work Notes option—just like in an Incident.
Closing Message:
With just a few clicks, you can transform the way your service agents interact with Requested Items. Enabling the Email Client empowers your team to stay in flow, communicate faster, and document work more effectively—all without navigating away from the task at hand.
This minor enhancement delivers a major boost in usability, consistency, and speed. No more toggling between modules, no more copy-pasting notes, and no more missed updates. By mirroring the behavior of Incidents, you unify your team’s workflow and reduce training time across different task types.
Whether you’re managing fulfillment, approvals, or customer inquiries, communication is key. And ServicePress isn’t just about making things work—it’s about making them work better. So don’t settle for the default. Take control of your workspace, extend its capabilities, and give your team the tools they deserve.
Productivity isn’t just a buzzword—it’s how you operate. And with a simple attribute, you just made it better.